Honeywell’s TH3110D1008 is a non-programmable digital thermostat, part of the PRO 3000 series, designed for reliable temperature control in residential settings.
This manual provides essential guidance for installers and users, covering installation, wiring, setup, and troubleshooting procedures for optimal performance and longevity.
It supports conventional and heat pump systems, offering a straightforward solution for maintaining comfortable indoor climates with ease and efficiency.
Overview of the TH3110D1008 Model
The Honeywell TH3110D1008 is a user-friendly, non-programmable digital thermostat meticulously engineered for consistent and dependable temperature regulation within homes. As a key component of the PRO 3000 series, it distinguishes itself through its simplicity and ease of operation, making it an ideal choice for those seeking a straightforward heating and cooling control solution.
This model is specifically designed to cater to both conventional heating and cooling systems, as well as heat pump configurations, demonstrating its versatility. The thermostat’s clear display presents current temperature readings and system status at a glance, while intuitive controls allow for effortless temperature adjustments.
The TH3110D1008 prioritizes functionality over complex programming, offering a reliable and efficient means of maintaining a comfortable indoor environment without the need for scheduling or advanced settings. Its robust construction and straightforward design ensure long-lasting performance and minimal maintenance requirements.
Key Features and Benefits
The Honeywell TH3110D1008 boasts several key features delivering substantial benefits to homeowners. Its non-programmable design ensures simplicity, eliminating the complexities of scheduling and offering immediate temperature control. The clear digital display provides easy-to-read temperature and system status information, enhancing user convenience.
Compatibility with both conventional and heat pump systems offers versatility, accommodating a wide range of home heating and cooling setups. Precise temperature control contributes to enhanced comfort and energy efficiency, potentially lowering utility bills.
Installation is streamlined with clear wiring terminal designations and detailed instructions, simplifying the process for professionals and experienced DIYers. The thermostat’s durable construction guarantees long-term reliability, while troubleshooting guidance assists in resolving common issues quickly. Ultimately, the TH3110D1008 provides a cost-effective and dependable solution for maintaining a comfortable home environment.

Installation Guide
Proper installation of the TH3110D1008 requires careful preparation, removal of the existing thermostat, secure wallplate mounting, and accurate wiring connections for optimal function.
Preparing for Installation
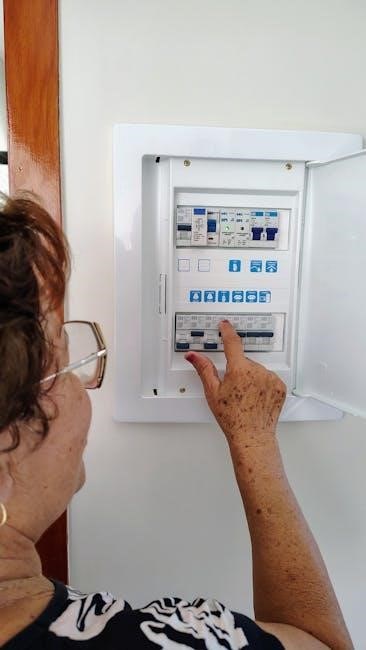
Before beginning the installation process for your Honeywell TH3110D1008 thermostat, ensure the heating and cooling system’s power is completely switched off at the breaker box to prevent electrical shock. This is a crucial safety precaution.
Gather the necessary tools, including a screwdriver, wire strippers, a level, and a pencil. Carefully unpack the thermostat and verify all components are present. Familiarize yourself with the wiring terminal designations outlined in the manual to understand the connections required for your specific system.
Take a photograph of the existing thermostat’s wiring configuration before disconnecting any wires – this will serve as a valuable reference during the installation of the new thermostat. Note the color and terminal connections of each wire. This detailed documentation will greatly simplify the wiring process and minimize potential errors.
Finally, ensure the wall surface where the thermostat will be mounted is clean, level, and free of obstructions.
Removing the Old Thermostat
Begin by carefully removing the cover of your existing thermostat, often by gently pulling it towards you. Once the cover is removed, you’ll have access to the wiring terminals. Before disconnecting any wires, refer to the photograph you took earlier – this is vital for correct re-wiring.
Use a screwdriver to loosen the terminal screws and carefully disconnect each wire, labeling them as you go if necessary. Avoid letting the wires fall back into the wall. Once all wires are disconnected, carefully remove the old thermostat’s wallplate from the wall.
Important: Note any mounting screws or anchors used to secure the old wallplate, as you may need to reuse them for the new Honeywell TH3110D1008. Ensure the wall surface is clean and free of debris before proceeding to mount the new wallplate.
Take extra care to avoid damaging the wires during removal, as this could create additional work during the installation process.
Mounting the Wallplate
Begin by positioning the Honeywell TH3110D1008 wallplate on the wall where the old thermostat was located. Ensure it’s level using a spirit level for accurate temperature readings. Mark the screw hole positions with a pencil, carefully noting their locations.
If necessary, drill pilot holes at the marked positions, using an appropriately sized drill bit for the wall material. If mounting into drywall, consider using wall anchors for added stability.
Carefully align the wallplate with the pilot holes and secure it to the wall using the provided screws. Ensure the wallplate is firmly attached and doesn’t wobble.
Pull the thermostat wires through the wire opening in the wallplate. This step is crucial for connecting the thermostat to your heating and cooling system. Double-check that the wallplate is securely mounted before proceeding to the wiring stage.
Wiring the Thermostat
Before wiring, always disconnect power to your heating and cooling system at the breaker box to prevent electrical shock. Carefully connect the wires to the corresponding terminals on the Honeywell TH3110D1008 wallplate, referencing the wiring terminal designations.
Ensure each wire is securely fastened to its terminal; loose connections can cause malfunctions. Use a small screwdriver to tighten the terminal screws, but avoid over-tightening.
The manual details wiring configurations for both conventional systems and heat pump systems. Pay close attention to these diagrams to ensure correct wiring. Incorrect wiring can damage the thermostat or your HVAC equipment.
Once all wires are connected, gently push any excess wire back into the wall opening. Double-check all connections against the wiring diagram before restoring power to the system.
Wiring Terminal Designations
The Honeywell TH3110D1008 utilizes specific terminal designations for proper system connectivity. R is for 24VAC power, while C is the common wire, essential for thermostat operation. W controls heating, and Y activates cooling.
For heat pump systems, O/B reverses the valve for heating or cooling, and Aux or E provides auxiliary or emergency heat. G activates the fan, and L energizes the fan for continuous operation.
Understanding these designations is crucial for correct installation. The manual provides a clear diagram illustrating each terminal’s function. Incorrect wiring can lead to system malfunctions or damage. Always verify wire connections against the diagram before restoring power.
Properly identifying and connecting each wire ensures optimal performance and prevents potential issues with your heating and cooling system. Refer to the manual for detailed illustrations.
Conventional System Wiring
For conventional heating and cooling systems, the Honeywell TH3110D1008 requires connecting wires to specific terminals. Connect the R wire to 24VAC power, and the C wire to the common terminal. The W wire controls the heating function, while the Y wire activates cooling.
The G wire operates the fan, and can be connected directly. Ensure all connections are secure and match the wiring diagram provided in the manual. Double-check that the wires are inserted fully into the terminals to prevent loose connections.
If your system lacks a C wire, a common wire adapter may be necessary for proper thermostat operation. Consult a qualified HVAC technician for assistance with C wire installation. Incorrect wiring can damage the thermostat or your HVAC system.
Always disconnect power to the system before beginning any wiring procedures. Safety first!

Heat Pump System Wiring
Wiring for heat pump systems with the Honeywell TH3110D1008 differs slightly from conventional setups. The R and C wires function as with conventional systems, providing 24VAC power and a common connection respectively. The Y wire now controls both cooling and compressor activation.
The W wire activates auxiliary or emergency heat. A separate O/B wire is crucial; it reverses the valve for switching between heating and cooling modes. Proper identification of the O/B wire is vital – incorrect connection can lead to reversed operation.
The G wire continues to control the fan. Always refer to the detailed wiring diagram in the manual for your specific heat pump configuration. Verify the heat pump’s wiring before connecting to the thermostat.
As always, disconnect power before wiring and consult a professional if unsure.
Thermostat Setup
Initial setup involves powering on the TH3110D1008 and configuring essential settings like system type and temperature scale for personalized comfort and accurate operation.
Initial Power-Up and Configuration
Upon initial power-up, the Honeywell TH3110D1008 thermostat will begin a self-test sequence, displaying information on the screen to confirm proper functionality. Allow this process to complete uninterrupted. The display will then prompt you to begin the configuration process.
The first step typically involves verifying the correct date and time. Accurate timekeeping is crucial for potential future features or compatibility with smart home systems. Use the up and down arrow buttons to adjust the values, and press the ‘Select’ or ‘Confirm’ button to save each setting.
Following date and time setup, the thermostat will guide you through selecting the appropriate system type – whether it’s a conventional heating and cooling system or a heat pump. Choosing the correct system type ensures optimal performance and prevents incorrect operation. Refer to the wiring diagrams if you are unsure of your system type.
Finally, the thermostat will ask you to choose your preferred temperature scale: Fahrenheit or Celsius. Again, use the arrow buttons to select your preference and confirm your choice. Once these initial settings are configured, your thermostat is ready for basic operation.
Setting the System Type
Accurately configuring the system type is paramount for the Honeywell TH3110D1008 to function correctly. The thermostat needs to understand whether it’s controlling a conventional heating and cooling system or a heat pump system. Incorrect selection can lead to inefficient operation or even damage to your HVAC equipment.
During the setup process, the thermostat will present you with options for system type. Typically, you’ll be asked to choose between “Conventional” and “Heat Pump.” If you have a standard furnace and air conditioner setup, select “Conventional.”
If your home utilizes a heat pump for both heating and cooling, select “Heat Pump.” Heat pump systems operate differently than conventional systems, and the thermostat needs to adjust its control logic accordingly.
If you are uncertain about your system type, consult your HVAC system’s documentation or contact a qualified HVAC technician. Selecting the wrong system type can result in improper heating or cooling, and potentially void your warranty. Double-check your selection before proceeding.
Setting the Temperature Scale (Fahrenheit/Celsius)

The Honeywell TH3110D1008 allows you to display temperatures in either Fahrenheit (°F) or Celsius (°C), catering to personal preference and regional standards. This setting is easily adjustable during the initial thermostat configuration, ensuring comfortable usability for all users.
Within the setup menu, navigate to the “Temperature Scale” option. You will typically be presented with two choices: “Fahrenheit” and “Celsius.” Use the up and down arrow buttons (or similar controls) to highlight your desired temperature scale.
Once selected, confirm your choice by pressing the “Select” or “Enter” button. The thermostat display will immediately switch to the chosen scale, showing all future temperature readings accordingly. This change is permanent until you deliberately alter it again through the setup menu.
Remember that changing the temperature scale does not affect the actual heating or cooling performance of your system; it only alters how the temperature is displayed on the thermostat’s screen.
Operating Instructions
The Honeywell TH3110D1008 offers simple operation for adjusting your home’s temperature and system modes, providing convenient climate control with intuitive functionality.
Its user-friendly interface ensures effortless adjustments for optimal comfort.
Display Overview and Icons
The Honeywell TH3110D1008 thermostat’s display provides clear and concise information regarding your home’s heating and cooling status. The primary area showcases the current room temperature, prominently displayed for easy viewing. Adjacent to this, you’ll find the set temperature, indicating your desired comfort level.
Several icons illuminate to communicate system operation. A flame icon signifies active heating, while a snowflake icon indicates cooling is engaged. The “FAN” icon shows when the fan is running, regardless of heating or cooling. An “OFF” indicator confirms the system is in the off mode.
Additionally, the display may show indicators for low batteries, requiring prompt replacement to maintain accurate operation. Some models might also feature a signal strength indicator, relevant for Wi-Fi enabled versions (though the TH3110D1008 is not typically Wi-Fi enabled). Understanding these icons allows for quick assessment of your system’s performance and status at a glance, ensuring optimal comfort and efficiency.
Adjusting the Temperature
To adjust the temperature on your Honeywell TH3110D1008 thermostat, utilize the clearly marked up and down arrow buttons located on the front panel. Pressing the “up” arrow will increase the set temperature, while pressing the “down” arrow will decrease it. Each press typically adjusts the temperature by one degree, though this increment may be configurable in some advanced settings (if available on related models).
The display will dynamically update to reflect the new set temperature as you make adjustments. Allow a few moments for the system to respond and reach the desired temperature. Note that the thermostat will automatically control the heating or cooling system to maintain the setpoint.
Avoid making rapid or excessive temperature adjustments, as this can strain the system and reduce energy efficiency. Small, incremental changes are generally recommended for optimal comfort and cost savings. The current and set temperatures are always visible on the display.
System Mode Selection (Heat, Cool, Off)
Selecting the appropriate system mode is crucial for proper operation of your Honeywell TH3110D1008 thermostat. The thermostat offers three primary modes: Heat, Cool, and Off. To cycle through these modes, use the “Mode” button on the thermostat’s control panel. Each press will advance to the next available mode;
In Heat mode, the thermostat activates the heating system when the room temperature falls below the setpoint. Cool mode activates the cooling system when the room temperature rises above the setpoint. Off mode disables both heating and cooling, allowing for manual control or system shutdown.
The currently selected mode is clearly indicated by an icon on the thermostat’s display. Ensure the correct mode is selected based on the season and your desired comfort level. Incorrect mode selection can lead to inefficient operation or discomfort.

Troubleshooting
Addressing common issues with your Honeywell TH3110D1008 is often straightforward. This section details solutions for typical problems and explains error code meanings.
Resetting the thermostat can resolve many operational hiccups, restoring it to factory settings.
Common Issues and Solutions
Display is blank: First, verify the thermostat has power. Check the circuit breaker and ensure the wiring connections are secure. If the display remains blank, a battery replacement (if applicable) might be necessary.
Incorrect temperature readings: Ensure the thermostat isn’t exposed to direct sunlight, drafts, or heat sources, as these can affect accuracy. Recalibrate the temperature if needed, consulting the setup instructions.
System not responding: Confirm the system mode (Heat, Cool, Off) is correctly selected. Verify the wiring is correct for your specific system type – conventional or heat pump. A faulty wire connection is a frequent cause.
Heating or cooling runs constantly: Check the set temperature is appropriately set. Inspect the wiring for short circuits or incorrect connections. A malfunctioning sensor could also be the culprit, requiring professional attention.
Thermostat doesn’t switch between heating and cooling: Ensure the system type is correctly configured during initial setup. Verify the wiring for the changeover valve or reversing valve is accurate.
Error Codes and Their Meanings
While the Honeywell TH3110D1008 is a simpler model, certain error indications may appear. A flashing display often signals an issue. Unfortunately, this thermostat doesn’t display specific alphanumeric error codes like more advanced models.
Instead, it uses flashing patterns. A rapidly flashing display generally indicates a sensor error – potentially a faulty room temperature sensor. This requires professional diagnosis and repair.
Slowly flashing displays can signify communication problems with the heating or cooling system. Double-check all wiring connections at the thermostat and the HVAC unit itself.
If the display flashes intermittently, it could indicate low battery power (if batteries are used as backup). Replace the batteries with fresh ones.
Consistent, solid illumination without response suggests a potential internal fault within the thermostat, necessitating replacement. Always consult a qualified HVAC technician for complex issues.
Resetting the Thermostat
Resetting the Honeywell TH3110D1008 can resolve minor operational glitches or restore factory settings. However, it’s important to note this thermostat lacks a dedicated “reset” button. A power cycle is the primary method for resetting.
To perform a power cycle, first, turn off the power to the thermostat at the circuit breaker. Allow at least 30 seconds for all residual power to dissipate. This ensures a complete reset of the internal components.
After 30 seconds, restore power to the thermostat by switching the circuit breaker back on. The thermostat will then power up and initiate its startup sequence.
This process clears any temporary memory and returns the thermostat to its last saved settings. If issues persist after a power cycle, further troubleshooting or professional assistance may be required.

Technical Specifications
The TH3110D1008 operates on 24VAC power, handles temperatures between 32°F and 90°F, and measures approximately 4.7 x 3.1 x 1.2 inches with a light weight.
Power Requirements
The Honeywell TH3110D1008 thermostat is designed to operate with a standard 24VAC (Volts Alternating Current) power supply, commonly found in most residential heating and cooling systems. This low-voltage system ensures safe and efficient operation, minimizing energy consumption while providing reliable temperature control.
It’s crucial to verify that your existing HVAC system provides a compatible 24VAC power source before installation. The thermostat does not require batteries for primary operation; it draws its power directly from the HVAC system’s control wiring. However, some advanced features or during power outages, a battery backup might be supported by certain system configurations – consult your HVAC system documentation for details.
Incorrect voltage or wiring can damage the thermostat and potentially the HVAC system. Always disconnect power to the HVAC system at the breaker before commencing any wiring procedures. Professional installation is recommended if you are unfamiliar with electrical wiring.
Temperature Range
The Honeywell TH3110D1008 thermostat is engineered to accurately monitor and control temperatures within a broad range, suitable for most residential climates. The thermostat’s operational temperature range spans from approximately 32°F to 90°F (0°C to 32°C) for heating mode, ensuring comfortable warmth even in colder environments.
Conversely, in cooling mode, the thermostat effectively manages temperatures between 50°F and 90°F (10°C to 32°C), providing relief during warmer seasons. While the thermostat can display temperatures outside these ranges, its control functions are optimized within the specified operational limits.
It’s important to note that extreme temperatures beyond this range may affect the thermostat’s accuracy or performance. Proper insulation and HVAC system maintenance contribute to maintaining temperatures within the optimal range for efficient operation and longevity.
Dimensions and Weight
The Honeywell TH3110D1008 thermostat boasts a compact and unobtrusive design, making it suitable for various wall configurations. Its dimensions are approximately 4.7 inches (119 mm) in width, 3.1 inches (79 mm) in height, and 1.6 inches (41 mm) in depth. These relatively small dimensions ensure it doesn’t dominate the wall space, blending seamlessly into most interior decors.
Regarding weight, the thermostat is remarkably lightweight, tipping the scales at around 0.55 pounds (250 grams). This minimal weight simplifies the installation process, requiring minimal support from wall anchors or screws. The lightweight construction also contributes to its ease of handling during setup and maintenance.
These specifications allow for straightforward replacement of older thermostat models without requiring significant modifications to existing wall openings or wiring configurations.